Manage Data Grapes
Definition
A data grape is a logical representation of elements to export and import in a project.
In a data grape, you can:
- Choose the elements to include in datasets (tables, documents, etc…)
- Define logical relationships between tables or even databases
- Configure data sampling parameters
- Define filters to apply to the data
To create a data grape, simply click on the “Create a new Grape” button and give it a name.
Data Grapes Editor
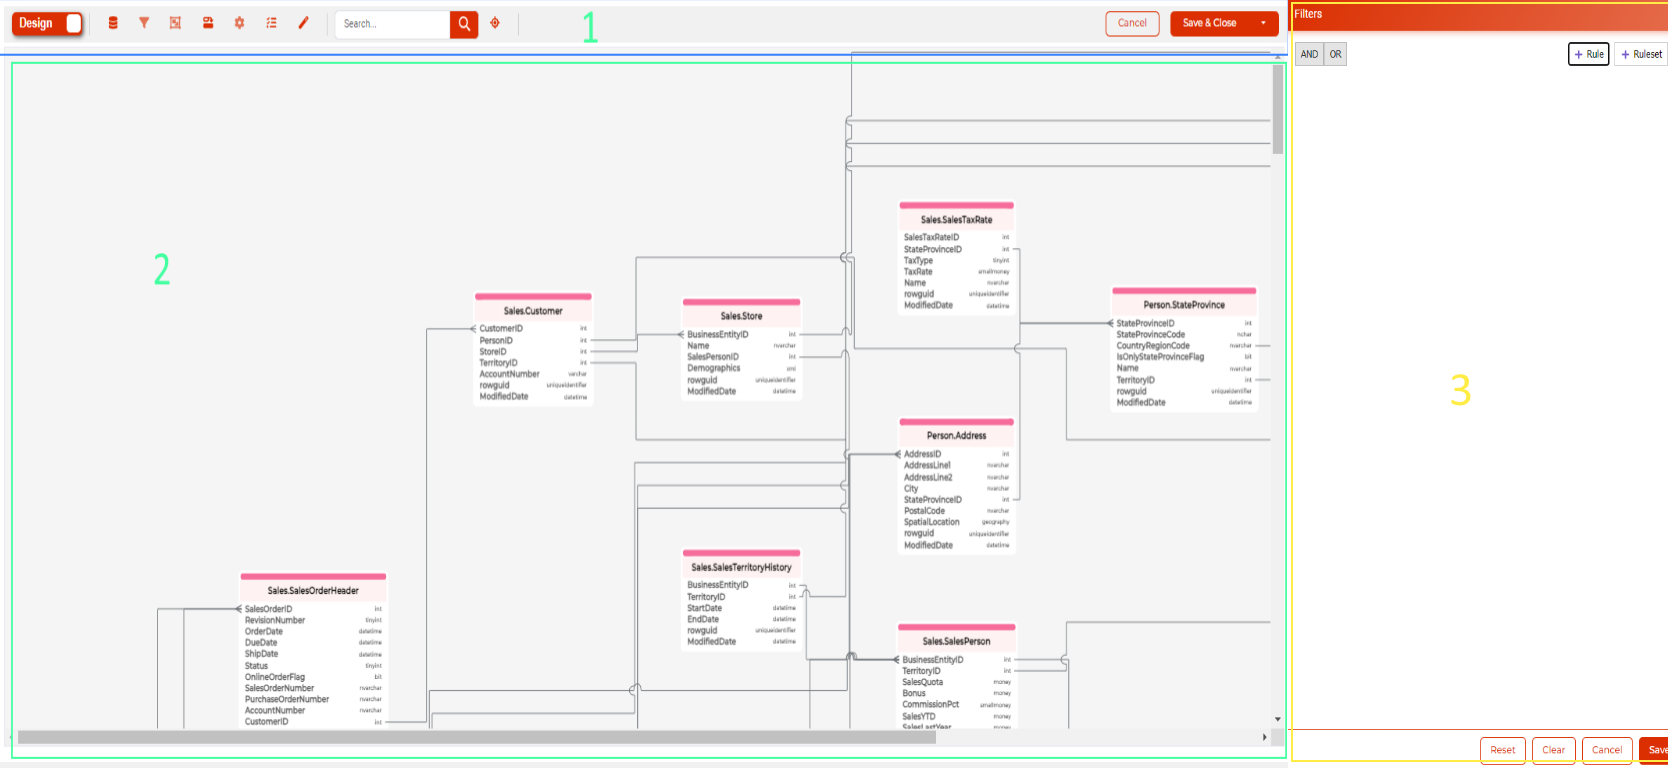
The editor consists of 3 parts:
- A toolbar (1)
- A display area (2)
- A parameter window displayed on actions (3)
Configuring a Data Grape
Selecting Elements to Include
Start by defining the elements to include in your grape by clicking on the element selector ![]() .
.
The parameter window appears, allowing you to select elements from one or more databases.
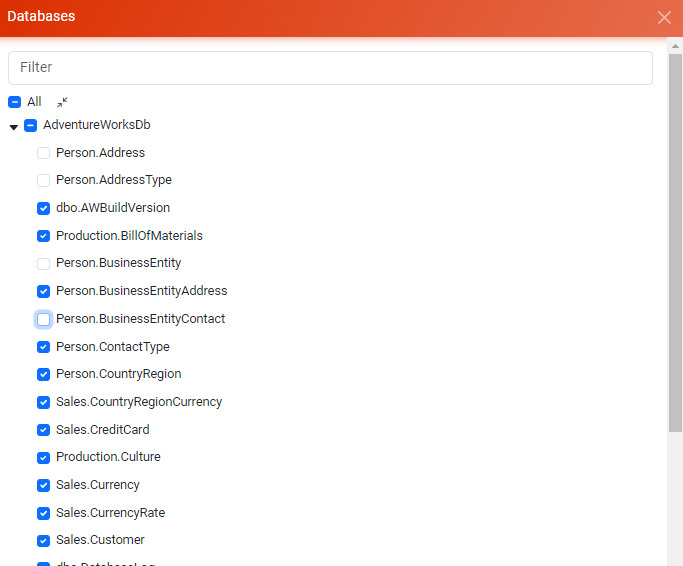
The selected elements are automatically added to the display area.
In the display area, you can move elements around, zoom in, and zoom out to navigate your schema effectively.
Configuring Data Filters
You can define simple or complex filters on any field in your data grape. No knowledge of SQL or any other language is required.
Start by selecting the element on which the filter will be applied, then click on the filter button  .
.
The parameter window appears:
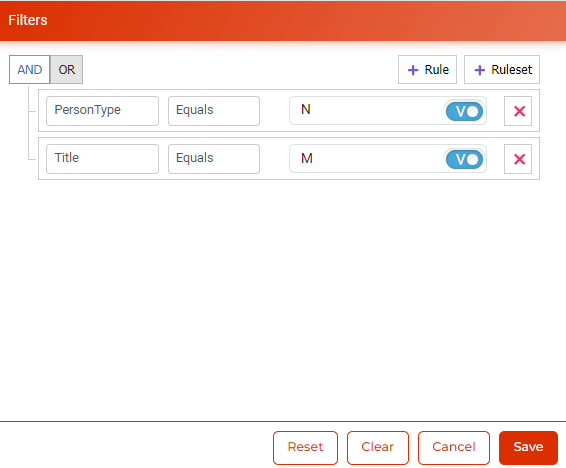
With the filter editor, you can define:
- A filter on a single field. For example: PersonType Equals N
- A filter on multiple fields. For example: PersonType Equals N AND Title Equals M
- A filter with multiple conditions. For example: PersonType Equals N AND (Title Equals M OR Tile Equals M). In this last example, there are two groups of rules.
When a filter is applied to an entity, the data will also be filtered on related entities. For example, if a filter is applied to a “Client” entity, only orders and payments of the corresponding clients will be included in the datasets.
Configuring Data Sampling
Grapes allow you to include a subset of data in your datasets. This feature is useful for limiting data volume in your test environments.
Example: Create a sample of 10% of client data.
By selecting an entity, then clicking on the sampling button  ), the parameter window appears.
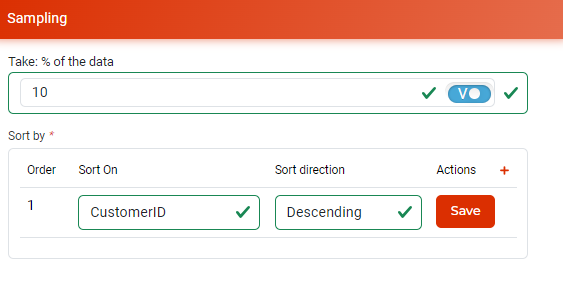
Two elements are configured in this window:
- The sampling rate expressed as a percentage
- The sorting to apply during sampling.
In the example above, Grapes will select 10% of clients in descending order of their creation.
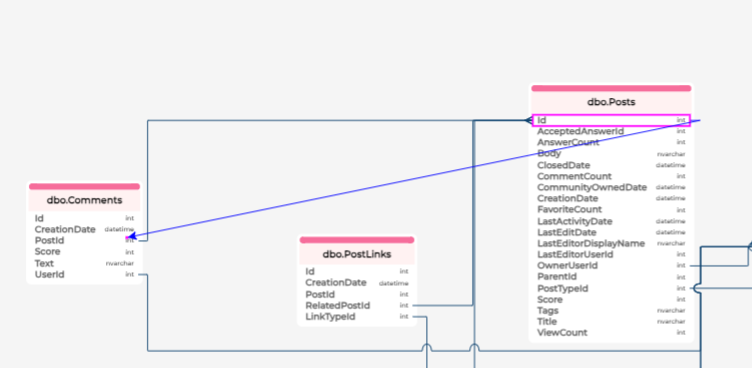
Managing Relationships Between Entities
In a data grape, you can add relationships that do not exist in the physical schema of the database. These relationships allow you to:
- Define relationships between entities within the same database when they do not exist in the physical schema
- Define relationships between entities across multiple databases. Thus, filter and sampling rules will be automatically propagated to linked databases.
To create a new relationship, simply drag a column to another (starting by clicking on the column type).
It’s also possible to create a relationship using the parameter window by clicking on the create relationship button 
Managing Parameters in a Data Grape
This window allows you to create parameters that you can use in filter or sampling rules. The values of these parameters will be filled in at the dataset level.
Example: Instead of creating two data grapes to export a 10% sample and another 20% sample, it is appropriate to:
- Create a parameter in the data grape
- Create two datasets. The first with the parameter set to 10% and the second to 20%.
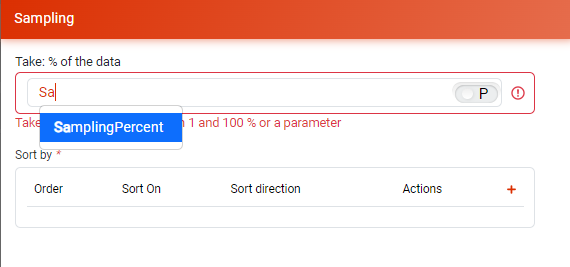
Parameters are used in the sampling and filter parameter windows. Switch to parameter mode  instead of value mode
  then type the first letter of the parameter name.