Self-Hosted Linux Agents
Introduction to Agents
If you already know what an agent is and understand its operation, feel free to skip directly to the following sections. However, if you want to learn more about their role and how they work, check out Manage Agents and Agent Pools.
Software Prerequisites
Ensure that your computer meets the following prerequisites:
Supported Distributions
- x64
- CentOS 7, 8
- Debian 10+
- Fedora 36 (or later)
- openSUSE 15 (or later)
- Red Hat Enterprise Linux 7+
- No longer requires a separate package
- SUSE Enterprise Linux 12 SP2 (or later)
- Ubuntu 22.04, 20.04, 18.04, 16.04
- Azure Linux 2.0
- ARM64
- Debian 10+
- Ubuntu 22.04, 20.04, 18.04
- x64
The agent software installs its own version of .NET to avoid any .NET prerequisites.
Hardware Prerequisites
The hardware specifications of your agents vary depending on your needs, team size, database size and complexity, etc. It is not possible to provide general recommendations applicable to everyone.
Installation Procedure
1- Create a Personal Access Token
Agent authentication is based on Personal Access Tokens (PAT).
To create a Personal Access Token, refer to Create a Personal Access Token
2- Create an Agent Pool
Refer to the page Create an Agent Pool
3- Create an Agent and Download the Linux Version
Refer to the page Create and download an agent
4- Once the agent is downloaded, unzip it into the directory of your choice.
5- Open a command line window to the bin directory of the agent installation.
6- Then run the configuration command displayed on the agent configuration page, providing the token created in step 1.
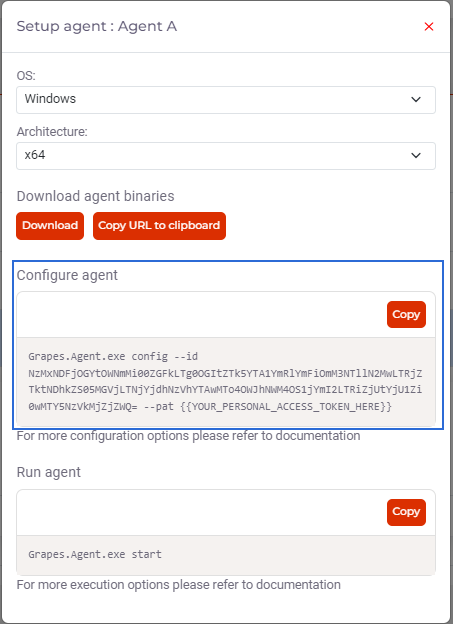
Example
DOTNET Grapes.Agent.dll config --id {{Agent ID}} --pat {{YOUR_PERSONAL_ACCESS_TOKEN_HERE}}
Several other non-mandatory parameters are available via the command line or through a configuration file to customize the behavior of the agent.
For more information, refer to the page Configuration of a self-hosted agent
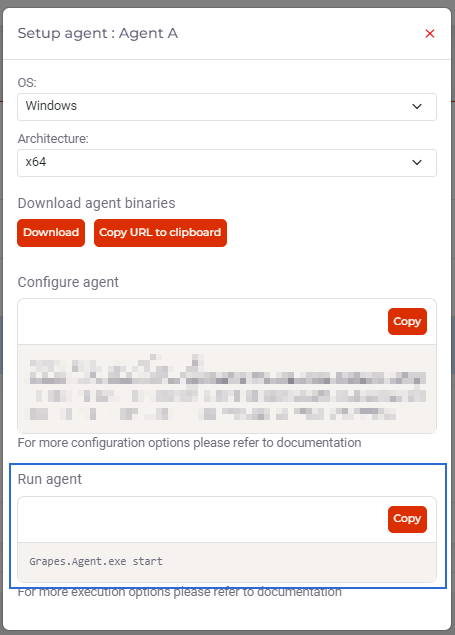
7- Start the agent with the execution command displayed on the agent configuration page.
8- Verify that the agent starts correctly.
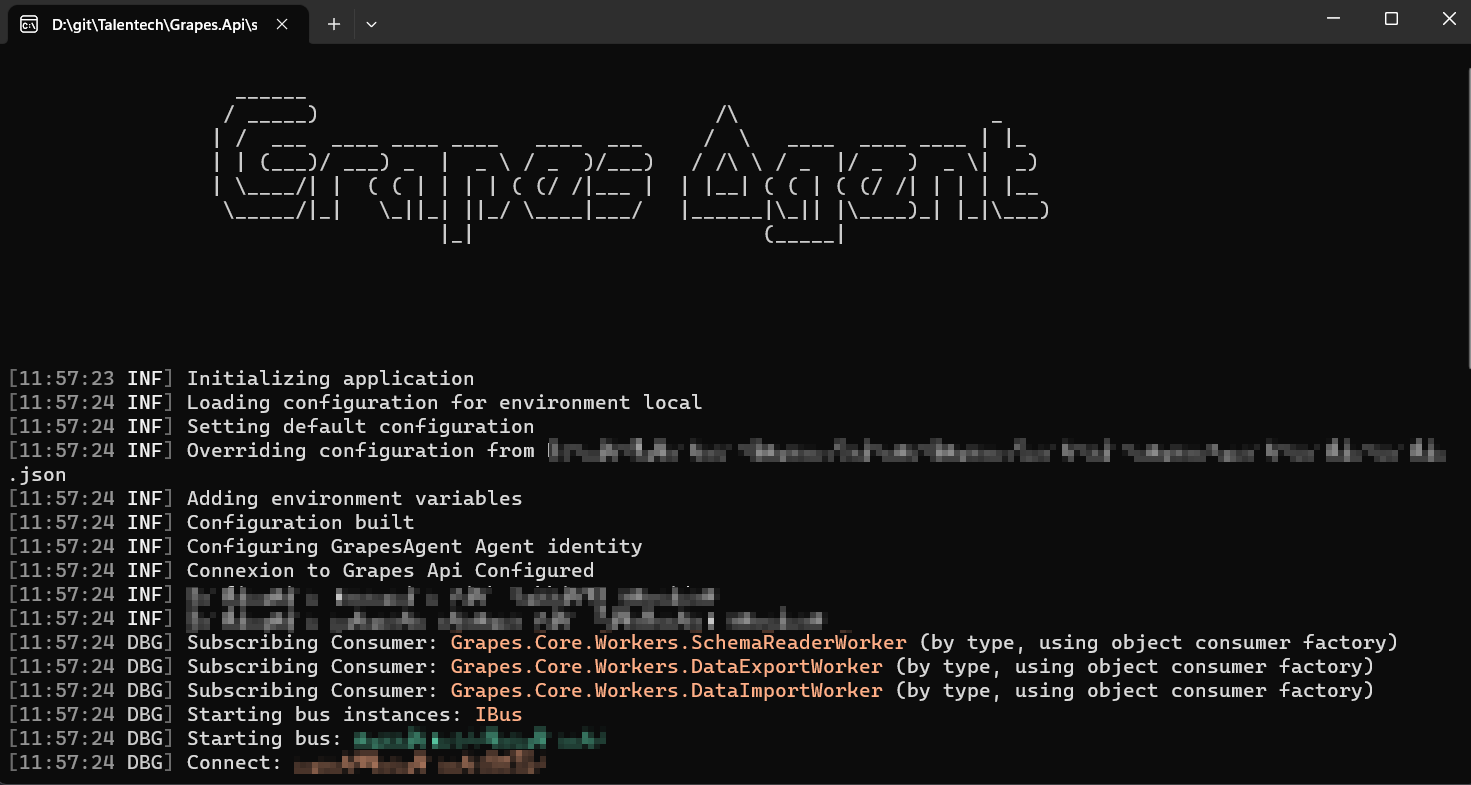
9- Check the agent status on the Grapes graphical interface.

10- The agent is ready to perform tasks.